Pages

Wednesday, December 3, 2014

Lots of Planning

So my first major e-Textile project is to bling-out an Ugly Christmas Sweater using the Lilypad development board.  I thought this was an original idea, but I guess it is pretty common to add lights to Christmas sweaters!  Some people have even added Christmas tunes.  So, because I feel the need to take this ugly sweater a step further, I plan to also activate some jingle bells with the vibrating motor.

While I have a great deal of experience with designing textile pieces, coding is very new to me.  I started exploring programming melodies during our Create Make Learn institute in July.  I am basically teaching myself by stealing some code and tweaking it to suit my project.  Since I do not have a lot of music knowledge, I am finding music that is geared more towards basic recorder playing---it has the notes written out for me.  I am then using the frequency chart below for the the code.

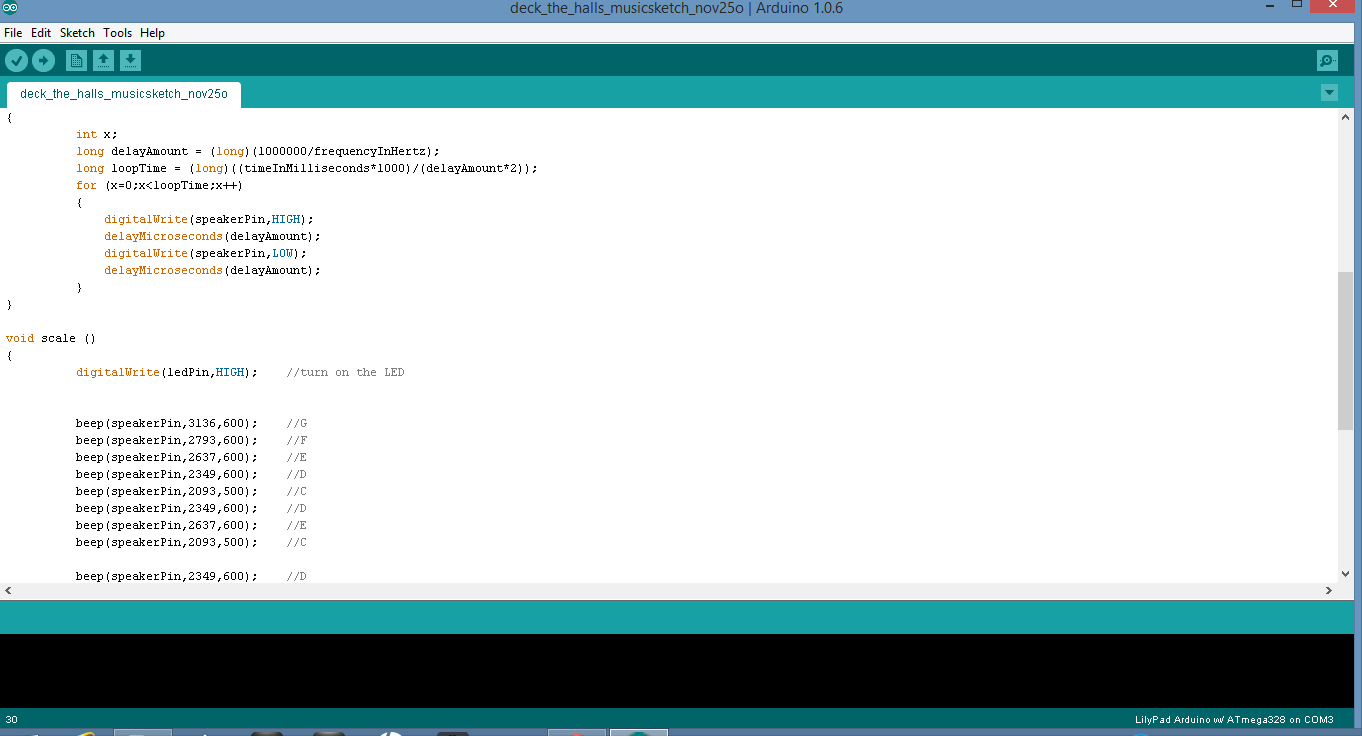
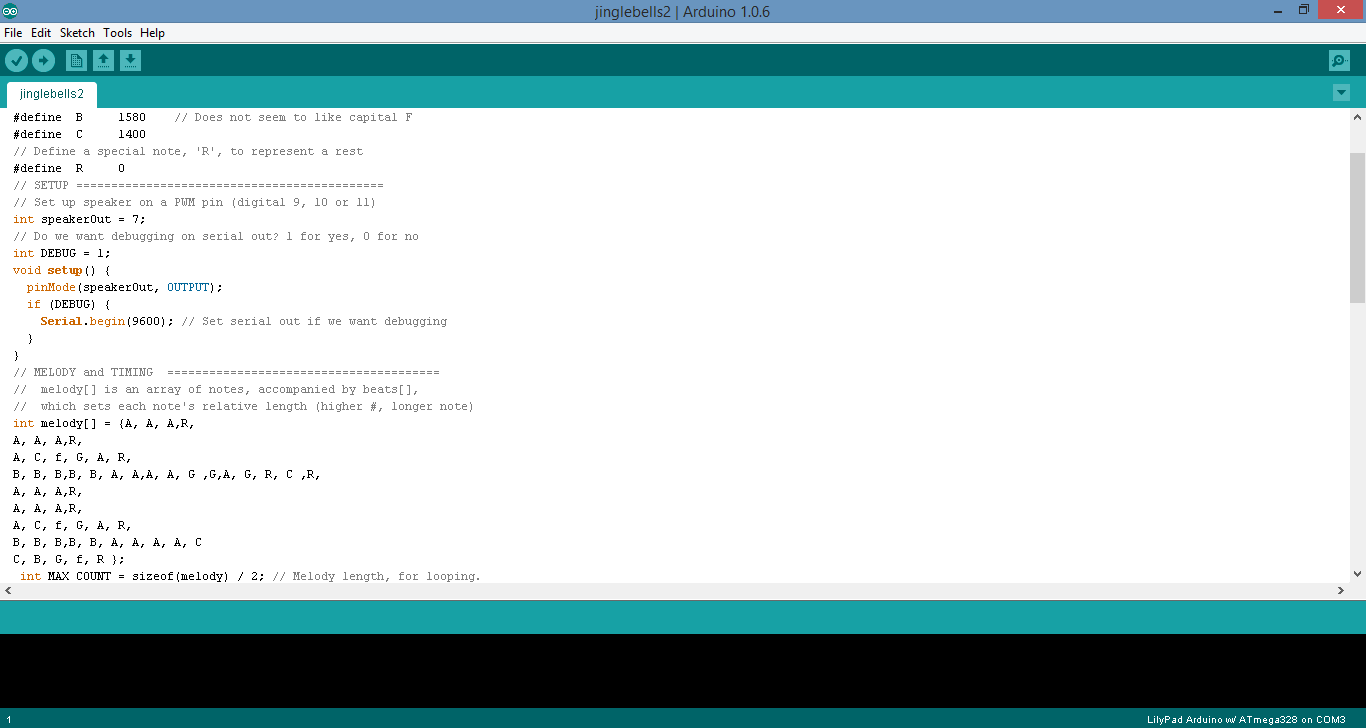
So far I have written code for both Deck the Halls and Jingle Bells.  I have to say that the second way (Jingle Bells) was much more efficient.  The notes are defined and then separated by commas in the melody. The pause is defined as "R" (rest), which has a "0" frequency.


My next step is to add in the green and red lights to match different notes.  I am fortunate to have a brother who writes code on a daily basis.  He has agreed to help me with this if I have a good plan.  I started to sketch out how I want everything to work together.  

Finding an ugly enough sweater was also no easy task!  I settled on this lovely red vest with sequined and embroidered Christmas trees.  I plan to also add some bells, a snowman, and maybe even some fringe.  I also started to sketch out where I might be sewing the electronic elements...


Faking it with Music

Jill thinks I know a lot more than I do about making my lights blink to music.

I'm not musical enough to add music to code  from sheet music. I can't read music, but I know people who can. 

 So when I created my first arduino code to music when I took Caleb's class, I wanted Jeopardy music to play during my 'game buzzer' so I did what anybody who can't read music would do -I reached out to my musical children. Hey kiddos.. can anyone write out the notes to Jeopardy for me. When I tried it it sucked. I then reached out again and got a quick lesson on how to read the charts that convert notes to frequencies.   Here is the chat I saved from that remote lesson for future reference.

And below is the code I came up with that project. 

It basically played Jeopardy music  after the user presses start while the game participants think of the answer until one of them presses a buzzer


---------------------------------------------
/*
SparkFun Inventor's Kit
Lucie's Game Buzzer

This is a game buzzer that could be used for a classroom quiz game between two players.
In this case the MC (teacher) would ask a question, then start the Game Buzzer.
The Game Buzzer
The Game Buzzer plays a short tune  and displays on the LCD a message to start guessing. 
As soon as one player has a guess, they press their assigned button. 
The display shows which player "pressed the button" and turns on his/her assigned LED. 
The MC can now entertain that guess for the player who pressed the button first.

In the code example below I color coded the code to match the components
green is for main program code
orange is for code impacting the LCD
blue is for code impacting the buzzer
brown is for code impacting the pushbutton and LED of player 1 with yellow LED
red is for code impacting the pushbutton and LED of player 2 with Red LED
*/

// Load the LiquidCrystal library, 
#include <LiquidCrystal.h>

// Initialize the library with the pins we're using.
LiquidCrystal lcd(12,11,5,4,3,2);

// Assign the buzzer Pin
const int buzzerPin = 9;

// set up an array with the notes we want to play

// Length must equal the total number of notes and spaces 
const int songLength = 20;
const int jsongLength = 64;

// Notes is an array of text characters corresponding to the notes
// in your song. A space represents a rest (no tone)
char notes[] = "Bac bac bbbb cccc bac"; 
char jnotes[] = "gCgcgCggCgCE  DCbaGgCgefgCgC ag f e d c"; 


/* the new pitches Adam figured out for me were g, HC, g, LC, g, HC, g, g, HC, g, HC, HE, (double rest), HD, HC, b, a, g#, g, HC, g, LE, f, g, HC, g, HC, rest, a, g, rest, f, rest, LE, rest, LD, rest, LC 
with the following beats
2, 2, 2, 2, 2, 2, 4, 2, 2, 2, 2, 1,1, 1, 1, 1, 1, 1, 1, 2, 2, 2, 1, 1, 2, 2, 4, 2, 1, 1, 1, 1, 1, 1, 1, 1, 1, 1, 4


  char names[] = { 'c', 'd', 'e', 'f', 'g', 'a', 'b', 'C', 'D','E','G' };
  int frequencies[] = {262, 294, 330, 349, 392, 440, 494, 523, 587, 659, 415};

*/

// Beats is an array of values for each note and rest.
// A "1" represents a quarter-note, 2 a half-note, etc.
// Don't forget that the rests (spaces) need a length as well.

int beats[] = {1,1,1,1,1,1,1,1,1,1,1,1,1,1,1,1,1,1,1,4};
int jbeats[] = {2, 2, 2, 2, 2, 2, 4, 2, 2, 2, 2, 1,1, 1, 1, 1, 1, 1, 1, 2, 2, 2, 1, 1, 2, 2, 4, 2, 1, 1, 1, 1, 1, 1, 1, 1, 1, 1, 4};


// The tempo is how fast to play the song.
// To make the song play faster, decrease this value.

int tempo = 150;
int jtempo = 200;


// Set up the buttons for Player 1 and 2 

const int button1Pin = 6;  // pushbutton 1 pin
const int button2Pin = 8; // pushbutton 2 pin
const int ledPinY =  13;    //  yellow LED pin
const int ledPinR = 1; // red pin 

// variables will change:
//int buttonPressed = 0;         // variable for reading if a button has been pushed 
//I was going to use this then decided this part was going to be for version 2.0 

void setup()
{

// Set up the buzzer pins to be an outpus:
pinMode(buzzerPin, OUTPUT);

// Set up the pushbutton pins to be an input:
 pinMode(button1Pin, INPUT);
 pinMode(button2Pin, INPUT);

 // Set up the LED pin to be an output:

 pinMode(ledPinY, OUTPUT);
 pinMode(ledPinR, OUTPUT); 
  
  // The LiquidCrystal library can be used with many different
  // LCD sizes. We're using one that's 2 lines of 16 characters,
  // so we'll inform the library of that:
   lcd.begin(16, 2);

  // clear any old data on the LCD
   lcd.clear();

  // Now we'll display a message on the LCD!  
  lcd.print("Ready To Guess?");

  // Adjusting the contrast with the Pentionmeter if necessary
     
}  //end setup

//Now for the main program

void loop()
{

//let's initialize our buttons 

   int button1State, button2State;  // variables to hold the pushbutton states
   button1State = digitalRead(button1Pin);
   button2State = digitalRead(button2Pin);
  
//checking to see if the buttons have been pressed 

while((digitalRead(button1Pin) == HIGH) && (digitalRead(button2Pin) == HIGH)) 

{
// if no buttons have been pressed play song

   int i, duration;
  
  for (i = 0; i < songLength; i++) // step through the song arrays
  {
    duration = beats[i] * tempo;  // length of note/rest in ms
    
    if (notes[i] == ' ')          // is this a rest? 
    {
      delay(duration);            // then pause for a moment
    }
    else                          // otherwise, play the note
    {
      tone(buzzerPin, frequency(notes[i]), duration);
      delay(duration);            // wait for tone to finish
    }
    delay(tempo/10);              // brief pause between notes

   //read the button state  
   button1State = digitalRead(button1Pin);
   button2State = digitalRead(button2Pin);

  } // end of song playing loop
  
  
 //  Check to see if button one is pressed and if it is turn on yellow light and change display
    
   if (button1State == LOW) 
   
                                                        // then...
  {
    digitalWrite(ledPinY, HIGH);  // turn the LED on then display message to LCD below

     lcd.begin(16, 2);
      lcd.clear();
     lcd.print(" Yellow Player can Guess ");


      int i, duration;
  
  for (i = 0; i < jsongLength; i++) // step through the song arrays
  {
    duration = jbeats[i] * jtempo;  // length of note/rest in ms
    
    if (jnotes[i] == ' ')          // is this a rest? 
    {
      delay(duration);            // then pause for a moment
    }
    else                          // otherwise, play the note
    {
      tone(buzzerPin, frequency(jnotes[i]), duration);
      delay(duration);            // wait for tone to finish
    }
    delay(jtempo/10);              // brief pause between notes


  }  
    lcd.clear();
     lcd.print(" Times Up ");   


  }
  else

//check to see if button 2 is pressed and if it is turn on red light and change display
  
   if (button2State == LOW) 
                                                        // then...
  {
    digitalWrite(ledPinR, HIGH);  // turn the LED on
     lcd.begin(16, 2);
      lcd.clear();
     lcd.print("Red Player Can Guess");
  
     int i, duration;
  
  for (i = 0; i < jsongLength; i++) // step through the song arrays
  {
    duration = jbeats[i] * jtempo;  // length of note/rest in ms
    
    if (jnotes[i] == ' ')          // is this a rest? 
    {
      delay(duration);            // then pause for a moment
    }
    else                          // otherwise, play the note
    {
      tone(buzzerPin, frequency(jnotes[i]), duration);
      delay(duration);            // wait for tone to finish
    }
    delay(jtempo/10);              // brief pause between notes


  }  
    lcd.clear();
     lcd.print(" Times Up ");   


  }
  else
  {
    digitalWrite(ledPinR, LOW);  // turn the LED off
  } //end of nested loop
    
  {
    digitalWrite(ledPinY, LOW);  // turn the LED off
  } // end of outer next If statement

}    // end the void loop program


  //  set the invisible cursor of the LCD  to the first column
  // (column 0) of the second line (line 1):

  lcd.setCursor(0,1);

  // Now we'll print the number of seconds (millis() / 1000)
  // since the Arduino last reset:

  lcd.print(millis()/1000);
  
}  // end of main program


//This is the function that gets called to play the tune


int frequency(char note) 
{
  // This function takes a note character (a-g), and returns the
  // corresponding frequency in Hz for the tone() function.
//Added some new frequencies to move across a second octave and include a G#
//uppercase G is really G# in this case 
  

  int i;
  const int numNotes = 11;  // number of notes we're storing
  
  // The following arrays hold the note characters and their
  // corresponding frequencies. The last "C" note is uppercase
  // to separate it from the first lowercase "c". If you want to
  // add more notes, you'll need to use unique characters.

  // For the "char" (character) type, we put single characters
  // in single quotes.
//added more notes to reach into a second octave and include a G#
//used the upper case G to represent G# so I didn't have to deal with strings


//  char names[] = { 'c', 'd', 'e', 'f', 'g', 'a', 'b', 'C', 'D','E','G' };
//  int frequencies[] = {262, 294, 330, 349, 392, 440, 494, 523, 587, 659, 415};

 char names[] = { 'c', 'd', 'e', 'f', 'g', 'a', 'b', 'C','D','E','G' };
  
 int frequencies[] = {262, 294, 330, 349, 392, 440, 494, 523, 587, 659, 415};


  // Now we'll search through the letters in the array, and if
  // we find it, we'll return the frequency for that note.
  
  for (i = 0; i < numNotes; i++)  // Step through the notes
  {
    if (names[i] == note)         // Is this the one?
    {
      return(frequencies[i]);     // Yes! Return the frequency
    }
  }
  return(0);  // We looked through everything and didn't find it,
              // but we still need to return a value, so return 0.
}
----------------------------------------------------------------

BTW.. going through the Spark Inventor Kit was very helpful in filling in some major gaps my understanding of so many different things about science, coding, and more.  There are still gaps left, but I'm so glad I went through those lessons. 
Back to my musical hat.  
 So for my musical hat, I used the sketch that came with the Sweater you posted. The LED's just flash back and forth at different beats for the 3 songs. I going to trust that others who know more about music than I coded knew the right beat and coded it correctly. 

I started with the musical sweater code

And realized the Switch song part did not work. But it has some code it in that I understood.. so with LOTS of trial and error I pulled out ONE song and added it segment by segment to a simple sketch of BASIC Switch.


Here is where my sketch stands now.  I want to play more with it,  but can't get back to it for a day or two. 

It's a basic switch with 4 LED's  
When you turn on the switch the music plays and the LED's blink with the notes (alternate LED) 
It looks like the function runs INSIDE the loop that is part of PARSE TUNE function  and that some type of 'beat' is passed to that function  .  When I looked at the original code it looks like the beat sent with the notes changes with each of the four songs, but I have not analyzed it enough to see how closely the beats and LED blinking are in sync. 

As you can see I'm not expert... but building on bits of knowledge gained here and there
-------------------------------------------------------------------------

int speakerPin = 7;

int ledPin = 6; // LED is connected to digital pin 13
int switchPin = 2; // switch connected to digital pin 2
int switchValue; // a variable to keep track of when switch is pressed


int led1 = A2;                          
int led2 = A3;

int led3 = A4;

int led4 = 6;

int songChoice; 

int ledPattern = true;
 const int beatLength = 50;

//Play music functions
void playTone(int tone, int duration) {

for (long i = 0; i < duration * 1000L; i += tone * 2) {

digitalWrite(speakerPin, HIGH);

delayMicroseconds(tone);

digitalWrite(speakerPin, LOW);

delayMicroseconds(tone);

}

}
//teach Lilypad what the notes and play that note when you are told to

void playNote(char note, int duration, boolean sharp) {

char names[] ={'c', 'd', 'e', 'f', 'g', 'a', 'b', 'C', 'D', 'E', 'F', 'G', 'A', 'B' };

int tones[]  = { 1915, 1700, 1519, 1432, 1275, 1136, 1014, 956, 851, 758, 716, 636, 568, 506 };

char names_sharp[] = { 'c', 'd', 'f', 'g', 'a', 'C', 'D', 'F', 'G', 'A' };

int tones_sharp[] = { 1804, 1607, 1351, 1204, 1073, 902, 804, 676, 602, 536 };

if (sharp == false) {

for (int i = 0; i < 14; i++) {

if (names[i] == note) {

playTone(tones[i], duration);

}

}

} else {

for (int i = 0; i < 10; i++) {

if (names_sharp[i] == note) {playTone(tones_sharp[i], duration);

}

}

}

}
//--- stop music

void playTune () {

 // Jingle Bells

char notes[]="b4b4b8b4b4b8b4D4g6a2b12,4C4C4C6C2C4b4b4b2b2b4a4a4b4a8D8b4b4b8b4b4b8b4D4g6a2b12,4,C4C4C6C2C4b4b4b2b2D4D4C4a4g12,8.";

parseTune(notes, beatLength, false);

}

//parse tune


void parseTune(char notes[], int beatLength, boolean loopSong) {boolean play = true;

for (int i = 0; notes[i] != '.' && play == true; i++) {

 alternateLeds();

//updateSwitchState();

//if (switchState == LOW) {

//play = false;

//} else {

if (notes[i] == ',') {

char len[3];

int count = 0;

while (notes[i+1] >= '0' && notes[i+1] <= '9' && count < 2) {

len[count] = notes[i+1];

count++;

i++;

}

len[count] = '\0';

int duration = atoi(len);

delay(duration * beatLength);

} else {

//alternateLeds();

char note = notes[i];

boolean sharp;

if (notes[i+1] == '#') {

i++;

sharp = true;

} else {

sharp = false;

}

char len[3];

int count = 0;

while (notes[i+1] >= '0' && notes[i+1] <= '9' && count < 2) {

len[count] = notes[i+1];

count++;

i++;

}len[count] = '\0';

int duration = atoi(len);

playNote(note, duration * beatLength, sharp);

}

delay(beatLength / 2);

}

}

//if (loopSong == true) {

//switchState = LOW;

//}

// make your LED blinsk

void alternateLeds() 
{

if (ledPattern == true) {

digitalWrite(led1, LOW);

digitalWrite(led2, HIGH);

digitalWrite(led3, LOW);

digitalWrite(led4, HIGH);

ledPattern = false;

} else {

digitalWrite(led1, HIGH);

digitalWrite(led2, LOW);

digitalWrite(led3, HIGH);

digitalWrite(led4, LOW);

ledPattern = true;

}
}

// stop alternate pattern


//------------

   
void setup()  
{  
      pinMode(ledPin, OUTPUT); // sets the ledPin to be an output
      pinMode(switchPin, INPUT); // sets the switchPin to be an input
      digitalWrite(switchPin, HIGH); // sets the default (unpressed) state of switchPin to HIGH

pinMode(speakerPin, OUTPUT);

pinMode(led1, OUTPUT);

pinMode(led2, OUTPUT);

pinMode(led3, OUTPUT);

pinMode(led4, OUTPUT);


//pinMode(buttonPin, INPUT);

}  
   
void loop() // run over and over again
{  
      switchValue = digitalRead(switchPin); // check to see if the switch is pressed
      if (switchValue == LOW) { // if the switch is pressed then,
          digitalWrite(ledPin, HIGH); // turn the LED on
          
          
playTune();

      }  
      else { // otherwise,
          digitalWrite(ledPin, LOW); // turn the LED off
      }  
}


-

Sunday, November 30, 2014

Baby, I've Started Coding My LilyPad!

Today, I sat down and started coding the song "Baby, It's Cold Outside," to get myself in the holiday spirit! I matched the notes on the sheet music with those on this frequency chart.  I struggled a bit with the length of the notes and rests, so I'd like to try to find a tool for that as well.

Ideally, I'd like to create a scarf that plays this song and flashes multicolored lights when the temperature dips.

I haven't yet figured out how to program lights to flash in sync with my music, but that is next on my list.  (It looks like Lucie has figured it out, though).

The video is less than thrilling, but you can hear how my song is progressing.


Building Off Each Others Learning

I think I have Jill to blame for this one. 
Jill added a site she discovered in our Diigo Group that showed a great Christmas Sweater that played music and had the lights blink to the music. 


Of course I needed this for my Chrismtas Hat.

I got the code running with a simple cut and past and modifying the pin assignments. 
But the Switch did not "switch songs"  and it only Played Deck the Halls.
So I started to study and research and experiment, and after 2 hours of not getting it to work, I decided to see if my SWITCH was broken on mhy LILYPAD.

That involved finding a very simple SWITCH and LED scheme and making sure the Switch worked.  It did.

So then I started to port over a little bit of code at a time and finally got it to play ONE SONG (my goal)  (got rid of the complexity of multiple songs.

But getting rid of the complexity helped me study the script enough so I'm getting a feel for MOST of it 

Got the music working on my Lilypad prototyping board.

Added the blinking LED's to the music.  YEAH. 

Now that I've played all day,  I need to take a break and go Grocery shopping.  

next step is to apply my learning onto my Christmas hats.
(and order some more seweable LED's;0) 

I'm thinking I want rando gentle Twinkle effect on the hat with a sensor that triggers the music and makes it start to blink to the music.

Thanks for the inspiration Jill.

Lucie


On Sun, Nov 30, 2014 at 9:31 AM, ProjectIGNITE <no-reply@diigo.com> wrote:
1 new Item See More »
Jill Dawson
shared by Jill Dawson 30 Nov 14 02:27:46 - Comment - Like
  • Jill Dawson
    Jill Dawson 30 Nov 14 02:27:46
    This project gets music and blinking lights to work together.  The code looks much more complex than anything that I've been able to do so far, but it may help us to figure some things out.

You received this message because you are a member of the group ProjectIGNITE at Diigo.com.

Your alert setting indicates that new additions to this group should be sent to you Immediately.
Click to change your email alert preference to: Daily, Weekly , Not subscribed


--
Lucie deLaBruere
www.LearningWithLucie.com
http://twitter.com/techsavvygirl

Google Voice (802) 557 0013

ldelabruere@gmail.com

--------------------------------------
Nothing is really work unless you would rather be doing something else.
  - James M. Barrie
---------------------------------------

Saturday, November 29, 2014

The Journey Officially Begins

Leah and I are excited about the opportunity to be the first recipients of the Ignite a Maker grant! 

Today, we spent the afternoon at the Generator taking the Rapid Prototyping Certification course, learning some basics about the laser cutter, 3D printer, Vinyl cutter, and CNC router. 

As of today, we have both taken the Generator Membership Orientation and we are ready to get started with making!

Lucie's Christmas Hat Part 1

Tonight I finally settled on which hat I would use for my Christmas hat. I had purchased a few hats at an antique shop last month,  but decided to play around with my Santa hat instead.  Not only was it less expensive, but it would be fun to wear around the holidays.  I started by reviewing serial and parallel circuit and creating some documentation of both and show why I chose serial circuits for this project.  I played with conductive materials and settled on some jewelry wire for this part of my hat.
Came to a good stopping point and now have a 3 green LED's wired in parallel powered by a coin cell battery housed in a switched battery holder.   Can't wait to start Phase 2.


IGNITE a Maker Round 1 - Our new Emerging Maker and Maker Mentors


We have just selected Jill Dawson and  Leah Joly as Emerging Maker/Maker Mentor for our Round 1 of the IGNITE a MAKER mini grants.  Leah and Jill are looking forward to building their e-Textile skills during the next two months.  Can't wait to see this collaboration take off.  Craig and Lucie will be joining them in their goals to move from emerging maker to maker mentor in the field of eTextiles.