Pages

Tuesday, December 30, 2014

Temperature Sensing Hat

In my last post, I shared my first completed eTextile, a hat that plays Rudolph the Red-Nosed Reindeer in sync with his flashing nose! After quite a bit of trial and error, I added a temperature sensor and got my hat working the way I want it to! Figuring out the code for this sensor wasn't entirely intuitive.

For example, I wanted the buzzer music to come on when the temperature dipped well below room temperature.  When trying to figure out the code for the temperature sensor, I spent a lot of time writing things like:


if(sensorValue <=155)
and if(sensorValue <=100) 
and if(sensorValue <=50)  


By using the Arduino Serial Monitor, I'd determined that the ambient temperature of my room equated to approximately 157 (I don't yet know how that translates to degrees in Fahrenheit).  I thought that using the <= sign would tell the LilyPad that I wanted it to trigger the music when the temperature went down.   This was NOT the case.

The correct way to achieve the result I was after actually looks like this:

 if(sensorValue >=155)

The >= sign doesn't seem to mean GREATER than in this case, because when the temperature goes DOWN, my music comes on.  I would like to understand this better.

In any case, when I wear my hat indoors the lights flash, but the music doesn't come on unless the ambient temperature is pretty chilly. The beauty of this is that the music should only come on when I'm outside, away from the delicate nerves of my loved ones (or to signal our need to heave another log onto the family hearth).

Here is a link to the code that I wrote (some of which has been modified from an Ugly Christmas Sweater Instructable). 

Saturday, December 20, 2014

Leg Warmers

I added LEDs and a Lily Pad Tiny Sparkle to each of these leg warmers, because my daughter wanted me to.

I've since learned that stretchy leg warmers and non-stretchy thread don't work well together.  I broke a thread taking them off and found myself wishing that they sparkled faster.


I am abandoning this idea in search of a more practical one...such as creating a blinking hat like the one that I saw an Essex senior wearing at the mixer! She used LilyPad and Adafruit neopixels that were individually programmable!  My supplies are in the mail!


Thursday, December 18, 2014

Wearable Social


We celebrated our hard work and shared our creative breakthroughs at the Generator's social event this evening!


Monday, December 15, 2014

This is Making

The artist has to be something like a whale swimming with his mouth wide open, absorbing everything until he has what he really needs.   -Romare Bearden

Sunday, December 14, 2014

Learning to Code with eTextile - Part 2


As I have been watching the learning happening in December as part of IGNITE a MAKER,  I can't be more pleased.  It is even better than  I had hoped.  This past month I have watched Leah, Jill, and myself each dive into eTextile projects, inspiring each other, motivating each other, and figuring thing out individually and sometimes together, constantly growing and inspired by each others progress.  This is the type of learning that Maker-ED is about.

Yet the teacher in me is dissecting the learning and realizing that each of us has some experience gaps that would stop many dead in their tracks.  It didn't stop us,  but it would stop many.  As much as we'd like all learners to become like us ~ fearless, gutsy, willing to take risk,  we also have to honor that some learners need a more linear path.    And even for those of us who are comfortable with the messy path that learning takes as we create and make,  there are times when we want to fill in the knowledge gaps.

And for these reasons  (1) filling in the gaps  or (2) providing a linear path for those who need it,  I've decided to take on writing a series of most that will lay down some foundational understanding of "coding".    There is a part of me that is thinking  "Don't do this,  let people experience learning to code more organically".  There is a part of me that is saying "Yes, do this,  this might be the perfect tool to engage a whole populations of new coders; it will give them the onramp they need to get the confidence they need to play more and explore coding more deeply.

What do you think?  Should I proceed?  Here are the first two post on my blog

Preparing to Code Using eTextile
Learning to Code with eTextile  (Part 1:  Anatomy of an Arduino Program)


What do you think?  Should I continue with this idea?  Is it a worthwhile venture?

Lucie


month period would be the perfect amount of time to develop a relationship between emerging makers
http://learningwithlucie.blogspot.com/2014/12/preparing-to-code-using-etextile.html

My Reindeer Hat is Ready for the Generator!

 It's finished (with the exception of a few embellishments)!

A post containing my code is linked HERE!
I didn't spend much time on my schematic, because the vision in my head was too hard to draw.
The audio in this video doesn't capture the actual sound!


Rudolph Hat...a work in progress.

Please click on the following link to read the post that I just wrote on my personal blog.  Leah, I'm not sure, but I think I may have accidentally discovered why your speakers aren't loud enough.


Christmas Hat Debut


Hour of Code last week kept me very busy most of last week working with students and teachers from throughout Vermont.  But It also inspired me to keep working on my Christmas hat.  And today  the hat made its first appearance in public.  I wore it to  visit my friends Deb and Frank, and also wore it out to dinner.


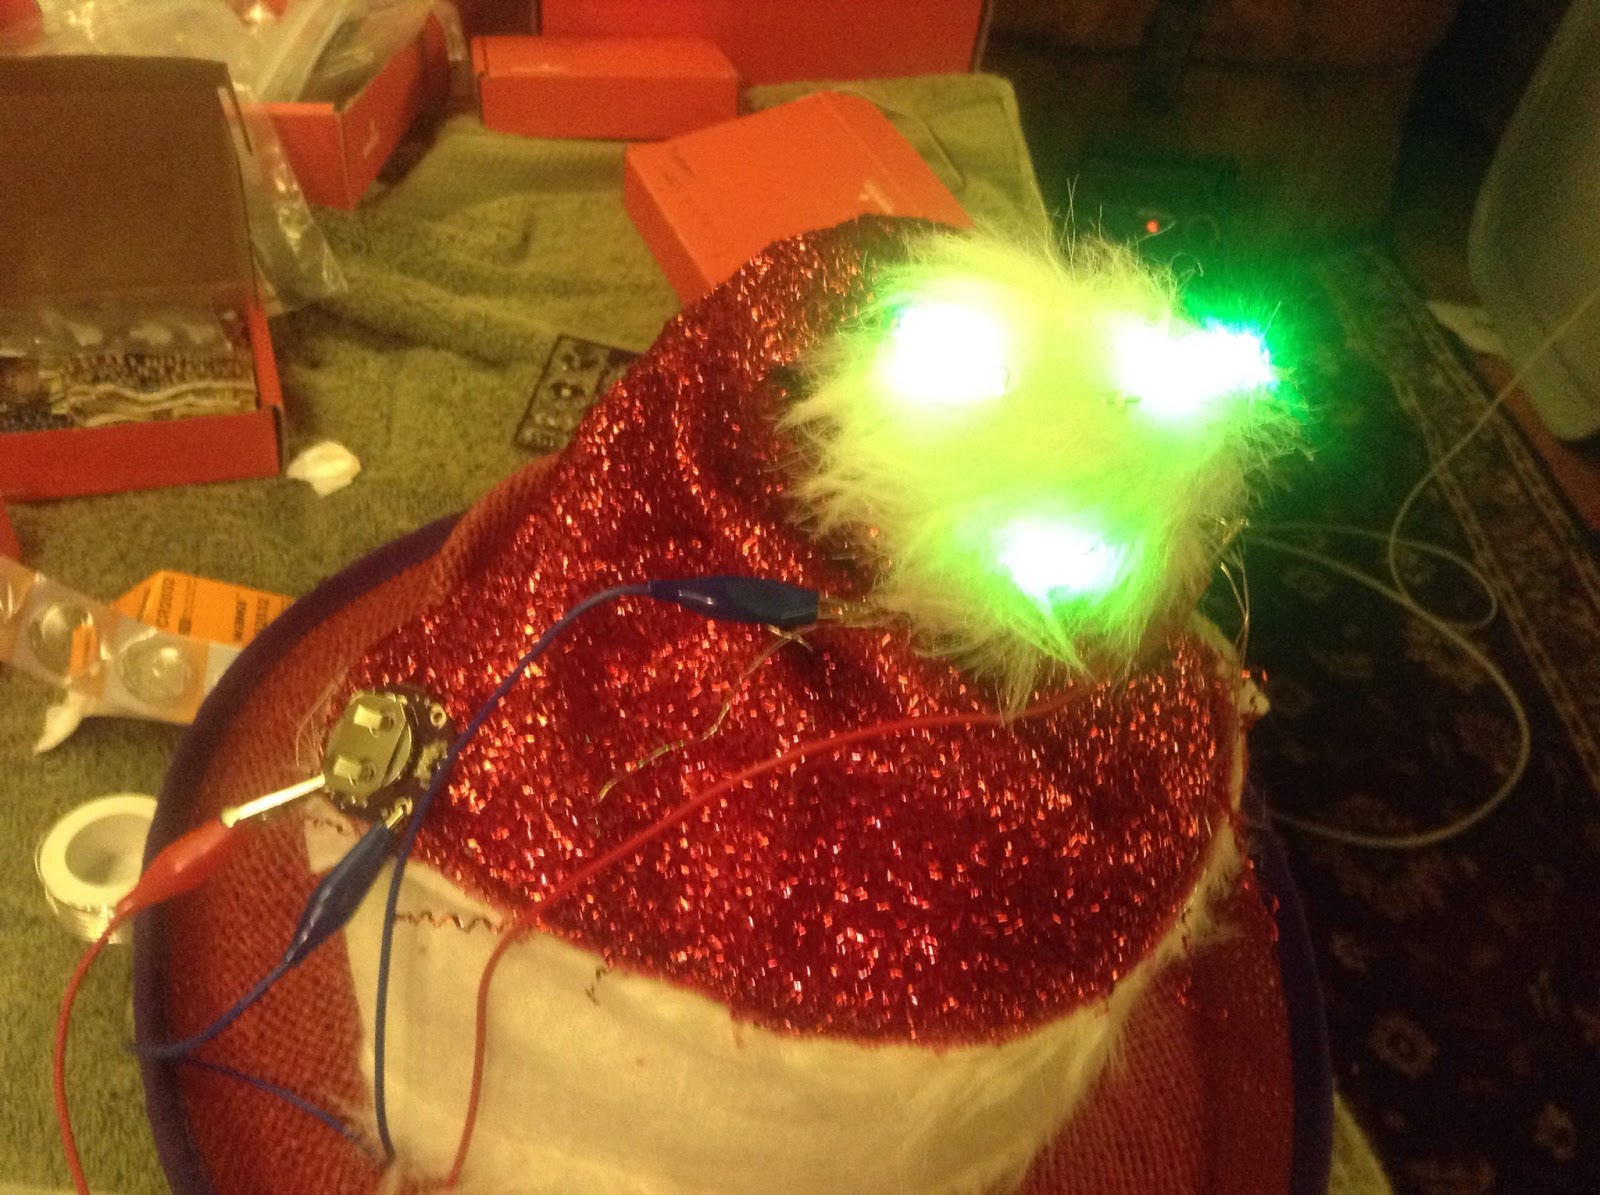
I finished some  last minute changes and solidified the connections with a little soldering.   Here is the current state of The Christmas Hat
1) The Pom Pom lights up green and stays lit
2) The LED's on the body of the hat will stay lit unless the music is playing. Then they will blink in beat with the music.  (originally they sequenced, but that interfered with reading the switch in a timely manner.
3) I got the hat working where I started the music by turning a slider Switch on. I wanted something more subtle.  So I changed it to use a TILT sensor.  And that sort of worked! But the sensor was so sensitive that I switched the program so that the sensor actually turned off the hat.
4) Eventually I decided that I needed a way to have a MUSIC mode  and a NON Music Mode and that the TILT switch would only turn on the Music if the SWITCH for MUSIC Mode was on.  This involved setting up both sensors in serial.    Now I can leave the Switch ON  if I want to 'try to control my hat via tilt" which is just to prove that it can do it and I can turn the Switch Off if I want to STOP annoying my friends by accidentally triggering Christmas buzzer music.
5)  I added a few 3D printed snowflakes and off I went.

As we were leaving for my friends house, the  hat stopped working.  Turns out the lilo battery had drained.  A quick battery change had the hat working for another few hours.   I learned soo soo much doing this project.   On the three hour drive down,  I decided to clean up and document my code.


int speakerPin = A5;  // Buzzer is connected to Pin A5 on LED
int switchPin = A3; // Tilt Sensor is connected to digital pin A3


int ledPom = 6;   // LEDS in the pom pom positive lead connected to pin 6
int led1 = 5;     // LED string 1 is connected to pin 5                       
int led2 = 10;    // LED string 2 is connected to pin 10                       
int led3 = 11;    // LED string 3 is connected to pin 11                      
int led4 = 9;     // LED string 4 is connected to pin 9                       

// next line is not necessary but helpful in troubleshooting
int ledPin = 13; // LED on the Lilypad is connected to digital pin 13 on Lilypad board


// next we need to set up some variables that will keep track of information for us while program runs

int switchValue; // a variable to keep track of when switch is pressed or tilt sensor activated
const int beatLength = 50;  //what is the beat you want for the music
int ledPattern = true;  //check back on this

//int songChoice; 


//------------ this part runs once when you start the program


void setup()  
{  
      
      
        // set the speakerPin to be an OUTPUT
          pinMode(speakerPin, OUTPUT);
    
        // sets all the ledPins to be an output
          pinMode(ledPin, OUTPUT);
          pinMode(led1, OUTPUT);
          pinMode(led2, OUTPUT);
          pinMode(led3, OUTPUT);
          pinMode(led4, OUTPUT);
          pinMode(ledPom, OUTPUT);

      // sets the Switch Pin or tilt sensor to be an input and send it a SIGNAL positive 
        pinMode(switchPin, INPUT); // sets the switchPin to be an input
        digitalWrite(switchPin, HIGH); // sets the default (unpressed) state of switchPin to HIGH
} // end of the SETUP routines  
   
void loop() // this part of the program runs  over and over again
{  
   
    digitalWrite(ledPom, HIGH); //turn on 3 green leds in pom pom    
  
  //check to see whether the switch or tilt is on
    switchValue = digitalRead(switchPin); // check to see if the Switch/tilet is pressed
      if (switchValue == LOW) { // if the switch is not pressed or tilted 
          digitalWrite(ledPin, HIGH); // turn the LED on lilypad on for troubleshooting    
          playTune();  // to do the music functions and blinking

      }  
      else { // otherwise,
          digitalWrite(ledPin, LOW); // turn the lilypad  LED off
           sequenceLeds() ;   // display the LEDs according to the sequence function
     } // end  of if else         

} // end of the VOIDE Loop


//-------------------- the functions are below -------------------------------------------
// this function makes your LED blink; it gets called in the middle of playing the music 

void alternateLeds() 
    {

        if (ledPattern == true) {
            digitalWrite(led1, LOW);
            digitalWrite(led2, HIGH);
            digitalWrite(led3, LOW);
            digitalWrite(led4, HIGH);
            ledPattern = false;  // keeps tract of where blinking left off

        } else {

            digitalWrite(led1, HIGH);
            digitalWrite(led2, LOW);
            digitalWrite(led3, HIGH);
            digitalWrite(led4, LOW);
            ledPattern = true;  //keeps tract of where blinking left off
        } // end of if else
} // end of alternateLED function

//----------------------------------------------------------------------------------------
// this function tells the program what to do with the LED lights when not playing music
// I have them all lit for now


void sequenceLeds() 

{

    digitalWrite(led1, HIGH);
    digitalWrite(led2, HIGH);
    digitalWrite(led3, HIGH);
    digitalWrite(led4, HIGH);
 }  // stop sequence function 


/*------------------------------------------------------------------------
Play music functions The next few functions are all needed for music to play
This is a pretty complex group of related function for playing music and was set up so that you can add 
code that will let you play several different songs.  I took that part out

*/ 

//this is the function that starts tells the buzzer to make a sound and long to make that sound
// can I put the alternate blink here 


void playTone(int tone, int duration) {

      for (long i = 0; i < duration * 1000L; i += tone * 2) {
      digitalWrite(speakerPin, HIGH);
      delayMicroseconds(tone);
      digitalWrite(speakerPin, LOW);
      delayMicroseconds(tone);
          } //end the for loop
    }  //end the playTone function


//teach Lilypad how to play music ~ what the notes and sharps sound like and play that sound for each note in my song 


void playNote(char note, int duration, boolean sharp) {

  char names[] ={'c', 'd', 'e', 'f', 'g', 'a', 'b', 'C', 'D', 'E', 'F', 'G', 'A', 'B' };
  int tones[]  = { 1915, 1700, 1519, 1432, 1275, 1136, 1014, 956, 851, 758, 716, 636, 568, 506 };
  char names_sharp[] = { 'c', 'd', 'f', 'g', 'a', 'C', 'D', 'F', 'G', 'A' };
  int tones_sharp[] = { 1804, 1607, 1351, 1204, 1073, 902, 804, 676, 602, 536 };

    if (sharp == false) {
      
        for (int i = 0; i < 14; i++) {
            if (names[i] == note) {
            playTone(tones[i], duration);
            }
          }//end the for loop

     } else {
       
        for (int i = 0; i < 10; i++) {
            if (names_sharp[i] == note) {playTone(tones_sharp[i], duration);
            }
        }// end the for loop
    } // end the if else routine

} // end the playNote function


//----- what song do you want to play and what what notes and beats make up that song

void playTune () {

 // Jingle Bells notes and beats

    char notes[]="b4b4b8b4b4b8b4D4g6a2b12,4C4C4C6C2C4b4b4b2b2b4a4a4b4a8D8b4b4b8b4b4b8b4D4g6a2b12,4,C4C4C6C2C4b4b4b2b2D4D4C4a4g12,8.";

    parseTune(notes, beatLength, false); // send these notes and beats to the parseTune function

}// end of play Tune function


//this function actually figures out which note to play, how long to play it and if its a sharp or not

void parseTune(char notes[], int beatLength, boolean loopSong) {boolean play = true;

  
  for (int i = 0; notes[i] != '.' && play == true; i++) {  //do the for loop til I run out of notes

     alternateLeds();  //go do the function that makes the LEDs blink then continue below


  if (notes[i] == ',') {
      char len[3];
      int count = 0;

  while (notes[i+1] >= '0' && notes[i+1] <= '9' && count < 2) {
      len[count] = notes[i+1];
      count++;
      i++;
    }
      len[count] = '\0';
      int duration = atoi(len);
      delay(duration * beatLength);

  } else {

//alternateLeds();  erase this I think..cause I did it on top of the loop 

  char note = notes[i];
  boolean sharp;

    if (notes[i+1] == '#') {
      i++;
      sharp = true;
    } else {
      sharp = false;
    }

    char len[3];
    int count = 0;
    
    while (notes[i+1] >= '0' && notes[i+1] <= '9' && count < 2) {
        len[count] = notes[i+1];
        count++;
        i++;
    }len[count] = '\0';
      int duration = atoi(len);
      playNote(note, duration * beatLength, sharp);  // go ahead and do the Play Note function
        }
      delay(beatLength / 2);
        }

}  // end of the parse tune function


// This is the end of the group of music functions


Saturday, December 13, 2014

Ugly Christmas Sweater...getting close to finishing

So I have been working away at getting my Ugly Christmas Sweater project finished in time for the holidays (and in time for Generator's e-Textile social on the 18th).  It has proven to be a very fun and challenging project.  I finished up the code on Thursday night (with the help of my talented brother) and was able to start sewing yesterday afternoon.  I had actually been invited to attend an Ugly Sweater party, so the race was on to get at least part of it working in three hours!
It took a lot of sketching to figure out where everything was going to go.


 I used a little tacky glue to adhere the different parts and a marker to sketch out my paths for stitching.


I'm not going to lie, it was very tricky to start and required a lot of thinking and problem solving.  Once I got the hang of it, I was able to work a little more quickly :)

Before the party, I was able to attach the board, two LEDs, the buzzer, and the motor!  If you remember from one of my earlier posts, my goal was to have alternating lights, play Jingle Bells, and have the motor actually jingle some bells.  Everything worked as it should, BUT the buzzer was way too quiet and the motor was not strong enough to jingle the bells.  I also did not have time to add the other eight LEDs before the party.

Today I was able to connect with some other makers at Generator and got some good feedback and suggestions for helping to solve the sound issue.  One woman suggested I tear a speaker out of one of those talking greeting cards and use that.  Jill also found that they sell them on the Sparkfun site.  I tried adding a larger buzzer that I picked up at Radio Shack.  While it proved to be louder, the tones were different.  The other idea I am playing with is making a fabric speaker.  I am just learning about it, but it involves constructing a spiral out of conductive material and using a magnet to amplify sound.  I only had a basic kitchen magnet to play with, but I think a strong magnet could really work. Can you hear the difference?

This evening I was able to add the eight additional lights.  Here is a little video of what I have so far.  I hope to fix the sound and motor issues in the next few days!


LED Headband Project

Today, Leah, Audrey (my daughter), and I attended a fun workshop at the Generator, learning how to create a Rainbow LED Headband.

Although I did not have time to learn much about the actual code of this project (we uploaded John's program), I learned a little about the Arduino Nano, downloading and extracting files, and putting them into the correct libraries on my computer.  This might not sound like a big deal, but it was new to me, just as the soldering was for my daughter.

Another take away:  parts from China can occasionally be defective!

Thursday, December 11, 2014

More Fun with Middle School Girls


Last week I started working with this group and it is amazing how much they (we) have learned in such a short time!  Using textiles is a huge motivator for getting the girls to learn about circuits.  Each of them was able to finish their holiday ornament/decoration after just two sessions (and a lunch time)!  Next week we will be moving onto wrist cuffs.  I wouldn't be surprised if I have a few buddies for lunch this week as they have many more ideas about how to combine, LEDs, felt, and batteries :)

Preparing to Code with eTextiles

While millions of students all over the world are learning to code during Hour of Code week,  I'm brushing up on my coding, too.  I've set a goal to learn to code using e-Textile and to also come up with a strategy to introduce coding to students through eTextile projects.  It's my belief that this will reach a different group of students than traditional coding curriculum.  MOTIVATION is the first step in learning anything.  For some,  making a turtle move across the screen or having "Hello World" flash on your screen does not provide the motivation to learn the idiosyncrasies of coding.   eTextiles get students who learn with their hands involved in the end results of their code first.  They can visualize their project, and start building it right away.  As it starts to look like their project, their mind imagines endless possibilities for what the code could do (if they only knew how).  I think this will work, we'll see.  I welcome all comments, suggestions, help tips -- especially from computer science teachers.  The terms I use might not be as precise as the ones you would use. I don't want to cause misconception, so please add your feedback in the comments.
 
First, I'm  going to provide a series of post that describe my understanding of the code of my current
eTextile  project  (A Christmas hat).  Then I'm going to follow up with what I hope are some projects that are targeted at leading students through some important coding concepts.

The steps leading up to this post included

1) Set up the Lilypad so it can communicate with your computer. 
I  chose to use the Lilypad ProtoSnap Board from Sparkfun.  Here are  some great directions for hooking it up to your computer. The trickiest part was to make sure I had the right drivers for my computer. One suggestion I have is to use two Lilypad boards.  I took the suggestion of my friend, Dayle Payne, and used two boards. One for prototyping and one for building.


2) Play around with some cookie cutter code that produced the desired results on my LilyPad protoboard. 

No sewing.. just playing with other peoples' code and seeing if I could get it to make lights blink and music play on my LilyPad.  Do NOT snap the components apart. By plugging the LilyPad development board directly into your computer intact, you KNOW that all the pieces are properly connected and you can focus on seeing that your code workds.  (No faulty wiring to worry about).  Also, don't worry about changing any of the code yet.  Just see if you can load up some sample Ardiuno code.  I'll create a whole separate blog post with some of my favorite GET STARTED CODE SNIPPETS for beginners.  Including some challenges for tweaking the code to get different results. 


3) Planning a design for the Christmas hat LEDs.
I started with a battery, some alligator clips,  jewelry wire and 3 green LED's and played around with getting the pom pom to light up. I learned that twisting together the leads from the 3 LEDs into one would create a parallel circuit.


Encouraged by my initial success of creating a basic circuit, I was inspired to expand my design with some sewable LEDs. I used LOTS of alligator clips and safety pins to come up with a design where the LEDs would be sprinkled around the hat.   This stage required me to go deeper with my understanding of parallel and serial circuits.


5) Sketch out your circuit design on paper.

Alligator clips are great, BUT  they are all insulated and you don't need to worry about 'shorts'.  As soon as I started to sketch out my design, I realized that my design was quite complex.  How was I going to stitch all the positive and negative leads back to the Lilyboard without creating a short.   I had no idea how to strategize this.  It was like a huge puzzle piece and I kept staring at it and started to feel that it was impossible.

I had two choices.  Simplify the design, or move forward and work through the puzzle and deal with the issues as they came up (knowing darn well there would be issues).  My husband's tip to do all the positive leads first helped.  Your positive leads have more constraints. Your goal is to get them from POINT A to POINT B without crossing.  The negative leads don't all have to make it back to the Lilypad board.  You just have to find a way back to another negative trace, and as long as you can avoid those positive traces, you're good.  So that part of the puzzle has several possible solutions.  And if you get really stuck,  you can always come up with a way to add a little insulation (more on that later).

 I moved forward and came up with a rough sketch of the positive and negative traces.


 6.  Start sewing. 

Finally I could avoid it no more.  Out came the conductive thread, the needle and the beeswax (to keep the thread from tangling so much).   My husband gave the advice to start planning and sewing the positive traces first.  It was great advice.  I also used a green marker to keep track of my negative traces.  I, also, used alligator clips to connect each LED's negative trace and my freshly sewed positive trace to a test battery.  The LilyPad battery holder worked great for this.


7.  Jump for Joy

And if all goes right,  when you sew your last LED, and turn the switch on your battery to on, and all the LEDs LIGHT UP,  I assure you you will squeal and jump for joy!  And voila, you now have EXTREMELY HIGH MOTIVATION to Learn to Code!


Next Post ~  Learning to CODE!


Wednesday, December 10, 2014

Coding on a Snow Day!

I posted about my day on my personal blog, at this link, but I wanted to share my goofy little video here!  I have lights, music, and a functioning temperature sensor that makes the motor vibrate.  I'm not sure how functional this piece will be in all reality, but I am having fun.

There is a
         S
           T
                                                                     E
                                                                       E
                                                                          P
                                                                         learning curve and                                                                                                                                            judicious borrowing                                                                                                                                       happening on my end.


Tuesday, December 9, 2014

Making

I stumbled across this video this afternoon.  Although it is about creative writing, it is spot on with how I am feeling with my e-Textile projects at the moment.


Saturday, December 6, 2014

I need more alligator clips

Prototyping and experimenting

My Music and Lights are in Sync!

The video above might not look like much, but I spent nearly all day today getting my Lily Pad to sync up with flashing green and red lights!

Here is a link to the code that I used, which is a combination of the music I coded last week (see previous post) and someone else's code for the lights.

The biggest problem that I am having at the moment is that there is a long pause at the end of the song and a couple of lights are flashing for reasons I cannot figure out.

My next step is to figure out how to get the music to turn on with a temperature sensor. 


Thursday, December 4, 2014

e-Textiles with Middle School Girls

Although I have lots of balls in the air right now, I also agreed to teach an afterschool class in Williston as part of the SPARK Academy.  I'll be working with a small group of fifth and sixth grade girls once a week for five weeks.  My goal is to have them create a felt ornament with one LED and a battery holder and the Sparkling Bracelet from Sewelectric.

Fortunately all of the girls have a little bit of sewing experience.  After a brief introduction of the project and materials, they were excited to get to work.  They started by sketching their design and planning where the light and battery holder would go.


Next, they set up their embroidery hoops and threaded needles (luckily I had remembered to purchase needle threaders!). We attached the battery holders with a little tacky glue.

The girls then cut out additional felt pieces they would need and tested their LEDs and batteries.


They poked the LED leads through the fabric and coiled them with needle nose pliers.  


Most of them were able to sew a line from the battery holder to one of the LED leads.  They are obviously excited because they asked if they could come work on their projects during lunch tomorrow!


Thinking about NGSS Connections

I've been thinking a lot about how each of us has been motivated to include music in our project and how each of us found ourself trying to understand the representation of the information as well as the science involved (frequencies).    Our individual projects made us all aware of some gaps in knowledge and understanding and increased our desire to bridge that gap.

Educational theory about the role of motivation in learning is at play here.   When you have personal motivation to learn something you are in prime readiness state to understanding.   So it seems natural that having some materials accessible for students as they reach that state in various maker project would be desirable to helping us make the connection between making and NGSS (Next Generation Science Standards).

I did a quick search for NGSS related resources that might provide some insight on which NGSS standards might relate to sound and frequencies, since it is obvious that all 3 of us are now involved with a need to better understand frequencies and sound to better have a deeper understanding of our projects and meet our need to be able to build our project towards a desired result.   Here are a few examples of what I found.

1) A lesson plan on Music and Sound from Engineering Outreach Program out of Berkley
http://www.crscience.org/lessonplans/2-Sound_and_Music-EEOutreach-13-14.pdf 
which had the following NGSS connections and some interesting resources for understanding some of the concepts. http://www-inst.eecs.berkeley.edu/~eegsa/or/sound.html


I was surprised that the lessons was targetted at early elementary grades.  Surely these concepts were build upon in standards for higher grade levels! I think each of us would agree that our search for increased understanding is at a much higher level than 2nd and 4th grade.   So with some more digging I was able to find that these standards so have a progression.
http://www.nextgenscience.org/sites/ngss/files/Appendix%20E%20-%20Progressions%20within%20NGSS%20-%20052213.pdf


So I'm feeling that my belief that  there can be connections with personalized learning,  making, and NGSS is validated when I look at this,  but I'm left with the some questions.
How do we satisfy the expectations that we be explicit when designing instructions to make start with the standards first and then design instruction  to the type of learning that I see happening in maker ed where the standards that are being met evolve out of pursuit of personalized learning which brought us to a state of prime readiness to learn the concepts.  
You could argue that if we had received science instruction that lead to deep understanding of these concepts in the first place, we might not be experiencing a gap of understanding about some of the science at play in our projects.      Yet it is these very projects that well help us reach higher levels of understanding of the concepts. (perhaps this is where cross cutting concepts come into play).  When I look at some of the lessons, including the lesson referenced above that ask students to cut out pictures representing sound and match them with concepts,  I yawn.   Not only would this activity NOT motivate me as a learner, but it certainly would not result in deep understanding.

It feels like a chicken and egg type of dilemma.

I think I have more questions than answers tonight.  But I just wanted to capture those questions in a blog post, so that I can reach out to science education experts for further dialogue about the connections with Maker ed.


Wednesday, December 3, 2014

Lots of Planning

So my first major e-Textile project is to bling-out an Ugly Christmas Sweater using the Lilypad development board.  I thought this was an original idea, but I guess it is pretty common to add lights to Christmas sweaters!  Some people have even added Christmas tunes.  So, because I feel the need to take this ugly sweater a step further, I plan to also activate some jingle bells with the vibrating motor.

While I have a great deal of experience with designing textile pieces, coding is very new to me.  I started exploring programming melodies during our Create Make Learn institute in July.  I am basically teaching myself by stealing some code and tweaking it to suit my project.  Since I do not have a lot of music knowledge, I am finding music that is geared more towards basic recorder playing---it has the notes written out for me.  I am then using the frequency chart below for the the code.

So far I have written code for both Deck the Halls and Jingle Bells.  I have to say that the second way (Jingle Bells) was much more efficient.  The notes are defined and then separated by commas in the melody. The pause is defined as "R" (rest), which has a "0" frequency.


My next step is to add in the green and red lights to match different notes.  I am fortunate to have a brother who writes code on a daily basis.  He has agreed to help me with this if I have a good plan.  I started to sketch out how I want everything to work together.  

Finding an ugly enough sweater was also no easy task!  I settled on this lovely red vest with sequined and embroidered Christmas trees.  I plan to also add some bells, a snowman, and maybe even some fringe.  I also started to sketch out where I might be sewing the electronic elements...